Template:Zh GoogleMap Description Map/ru
Создание карты
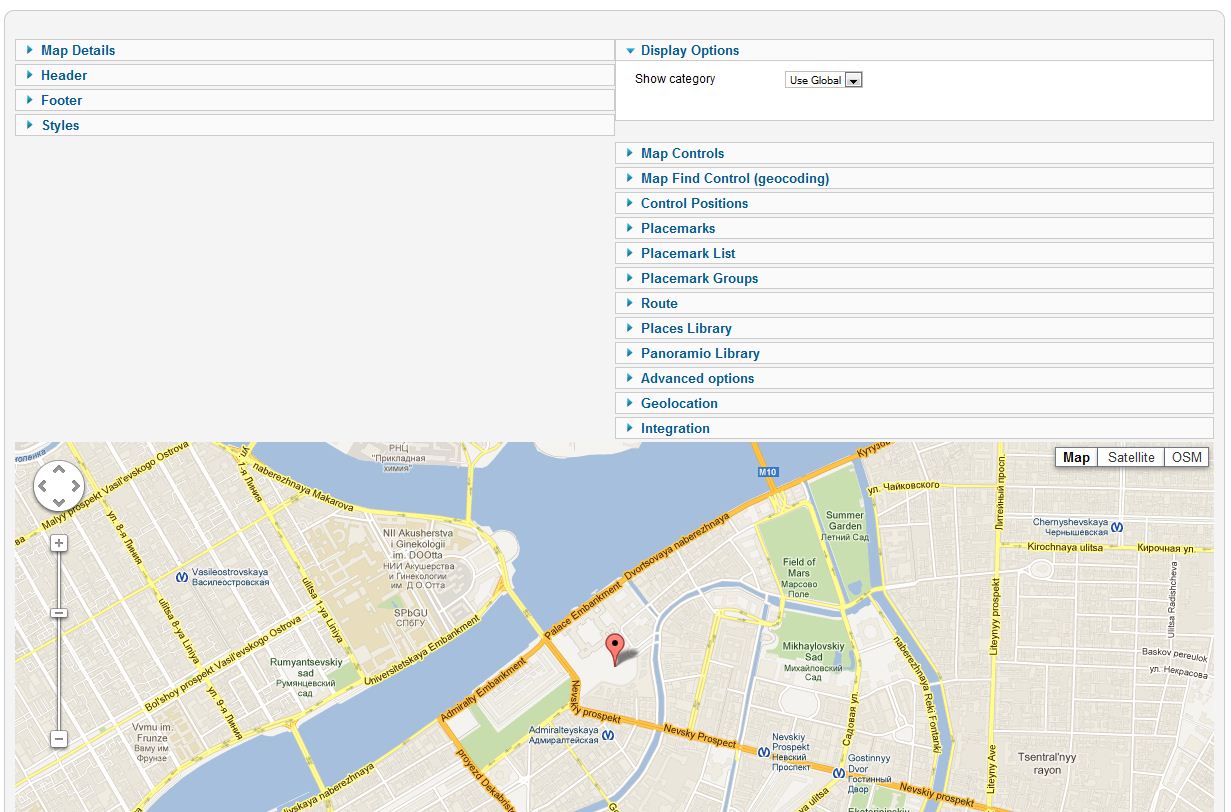
Переходим на закладку "Maps".
Вводим необходимое количество карт с нужной нам конфигурацией.
Координаты удобно выбирать путем перетаскивания метки (значения автоматически подставляются в поля формы) или кликая мышкой на необходимом месте.
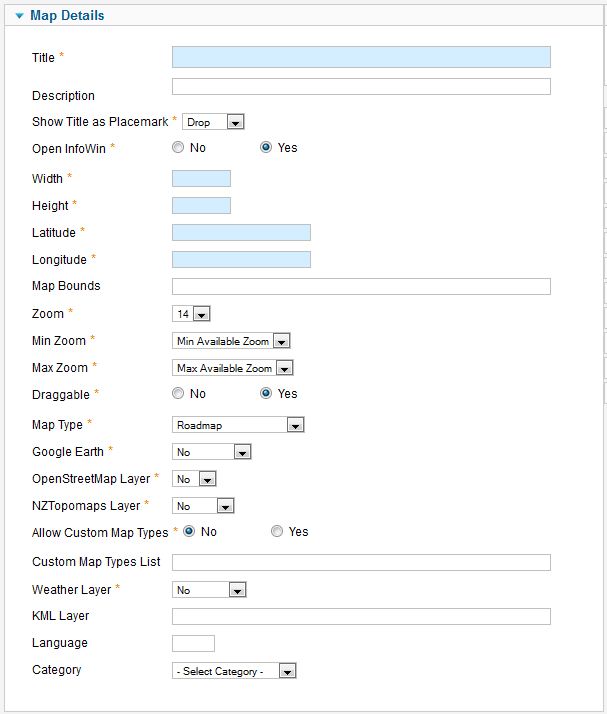
Свойства карты
| Title | Наименование карты |
| Description | Примечание |
| Show Title as Placemark | Выводить наименование карты как метку
|
| Open InfoWin | Сразу открыть всплывающее окно |
| Width | Ширина карты, если ввести 0, то карта откроется на всю ширину (100%) |
| Height | Высота карты |
| Latitude | Широта центра карты |
| Longitude | Долгота центра карты |
| Zoom | Начальный Масштаб карты |
| Map Type | Начальный Тип карты
|
| Google Earth | Разрешить переход на Google Планета Земля |
| OpenStreetMap Layer | Разрешить отображать слой 'OpenStreetMap' и возможность перехода на него с помощью переключения типа карт |
| KML Layer | URL адрес слоя KML, для вывода на карте |
| Category | Категория, к которой относится карта |
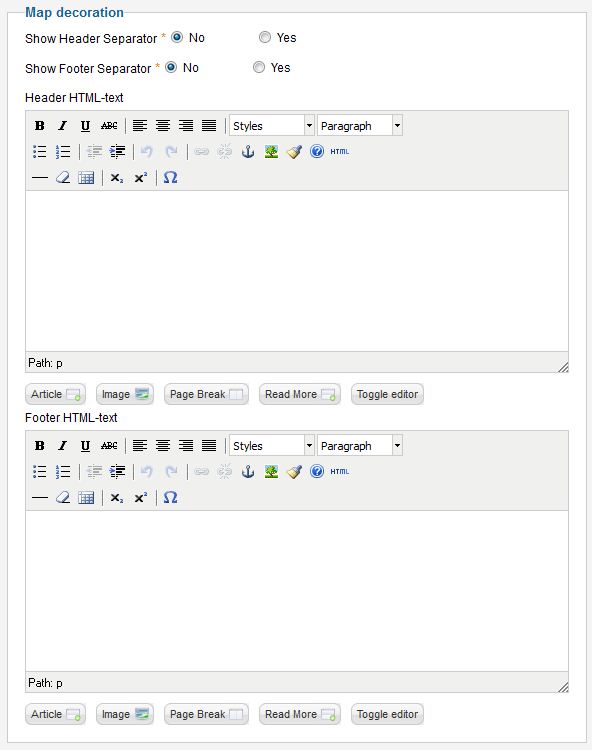
Оформление карты
| Header HTML-text | HTML текст над картой |
| Show Header Separator | Отображать верхний разделитель |
| Show Footer Separator | Отображать нижний разделитель |
| Footer HTML-text | HTML текст под картой |
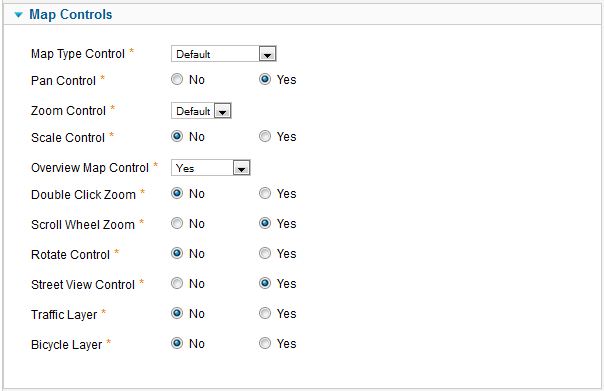
Элементы управления картой
| Map Type Control | Элемент управления переключением типа карты |
| Pan Control | Элемент управления перемещением |
| Zoom Control | Вывод элемента управления масштабом |
| Scale Control | Вывод шкалы масштабирования |
| Overview Map Control | Вывод обзорной карты |
| Double Click Zoom | Возможность масштабирования по двойному щелчку мыши |
| Scroll Wheel Zoom | Возможность масштабирования колёсиком мыши |
| Rotate Control | Вывод элемента управления поворотом |
| Street View Control | Вывод элемента управления обзором улиц |
| Traffic Layer | Вывод слоя 'Пробки' |
| Bicycle Layer | Вывод слоя 'Велосипед' |
| Find Control (geocoding) | Вывод элемента управления поиск через геокодирование |
| Find Control width | Ширина поля ввода адреса для поиска |
| Draw route from search point to place | Разрешить построение маршрута от найденного адреса до места |
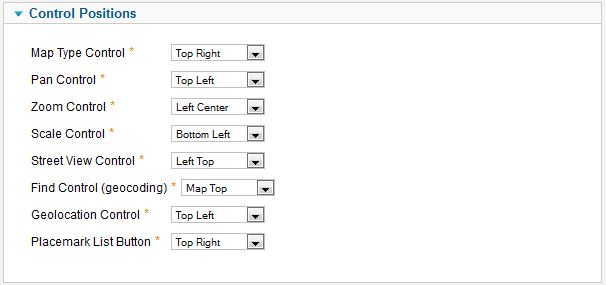
Control Positions
| Map Type Control | Расположение элемента на карте |
| Pan Control | Расположение элемента на карте |
| Zoom Control | Расположение элемента на карте |
| Scale Control | Расположение элемента на карте |
| Street View Control | Расположение элемента на карте |
| Find Control (geocoding) | Расположение элемента на карте |
Map Properties for Placemarks
| Show placemarks in cluster | Create cluster for markers |
| Marker Cluster Zoom Level | Zoom Level on which Cluster starts group markers |
| Group Placemarks in Cluster by Placemark Group Property | Create cluster for each marker group (and you can override cluster icon) Remember, if you use this feature (without managing markers by group list), you have to activate group in cluster (by setting Active in Placemark Group List) |
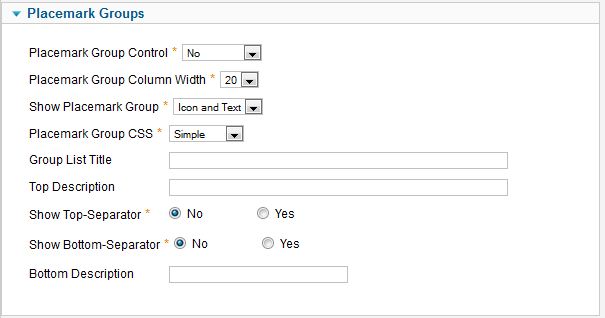
Managing Placemarks by Placemark Group List
| Placemark Group Control | Position and type of list of group, that would be displayed for marker management
|
| Placemark Group Column Width | Column width for the left or right position of list group |
| Show Placemark Group Icon | Show icon of group in list of group |
| Placemark Group CSS | Type of group decoration
There are two predefined style in
and one (external) – for you, which you can set style in you template. ID for tags depend on Placemark Group CSS field. See details in Marker Grouping |
| Group List Title | Group List Title |
| Top Description | Description on top of the list |
| Show Top-Separator | The enabled/disabled state of Separator on top of the list |
| Show Bottom-Separator | The enabled/disabled state of Separator on botom of the list |
| Bottom Description | Description on bottom of the list |
Using Marker Manager
File:GM-Map-Detail-PlacemarkManager.JPG
| MarkerManager | The enabled/disabled state of using Marker Manager Marker Manager displaying markers on definite zoom. |
You can use Marker Manager with restrictions:
- you can't use marker clustering - because cluster groups markers, and controls it displaying
- you can't use managing markers by group list
To use Marker Manager:
- set marker group for your markers
- set Min Zoom for Marker Manager and Max Zoom for Marker Manager for each group
- enable feature for the map
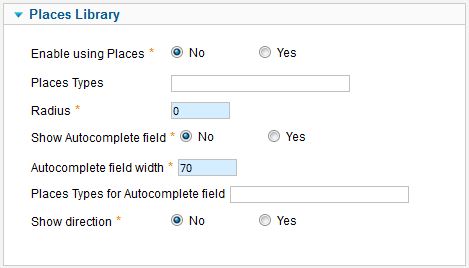
Using Places Library
| Enable using Places | The enabled/disabled state of using Places Library |
| Places Types | Places types in single quotes, delimited by comma for example: 'restaurant', 'store' |
| Radius | Radius from map center (in meters) If you don't want to see placemark from Places API, and only use autocomplete field, then set radius = 0 Places API show only up to 20 places! |
| Show Autocomplete field | The enabled/disabled state of using Autocomplete field |
| Places Types for Autocomplete field | Places types for Autocomplete field like a places types field, values in single quotes with comma delimiter
|
| Show direction | Show direction (by Directions API) from place, what you've found by autocomplete field (where marker is) and point on your map (which you set in map, center of map) |
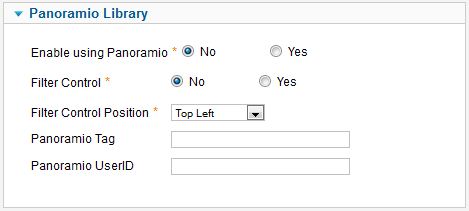
Using Panoramio Library
For using feature set enable by Enable using Panoramio = Yes
You can add filter control to map, and it's position.
And you can specify preset restriction on data by settin "Panoramio Tag" or|and "Panoramio UserID"
- tag - a panoramio tag used to filter the photos which are displayed. Only photos which have been tagged with the supplied string will be shown.
- userId - a panoramio user ID. If provided, only photos by this user will be displayed on the map.
- If both a tag and user ID are provided, the tag will take precedence.
Using Google Earth
We turn to component options.
Enter the key Google Earth API.
For you map select using Google Earth
- "Yes" - the map is displayed, but if you have not installed the plugin Google Earth Plugin, then that functionality is not available
- "Yes (Notify)" - the map is displayed, but if you have not installed the plugin Google Earth Plugin, then that functionality is not available and displays a message that there is no plug-in

