Zh OpenStreetMap Visualization: Difference between revisions
m (→Server) |
m (→Variables) |
||
| (8 intermediate revisions by the same user not shown) | |||
| Line 25: | Line 25: | ||
You can use for table names as full names, as names in joomla notation (ie starting from #__) | You can use for table names as full names, as names in joomla notation (ie starting from #__) | ||
And '''don't forget about ORDER BY clause in SELECT statement''' to get correct coordinates order for your lines or polygons | |||
== Examples == | == Examples == | ||
| Line 181: | Line 182: | ||
[[File:Visualization-Server.png]] | [[File:Visualization-Server.png]] | ||
As for ''Driver'' field, for MySQL you can use '''mysql''' or '''mysqli''' values, for ms sql server use '''mssql''' | |||
And assign it to Data Source | And assign it to Data Source | ||
[[File:Visualization-Data-Server.png]] | [[File:Visualization-Data-Server.png]] | ||
== Add Start and End points for Line == | |||
If you set path type to '''Line''' (to show your data as line) you can show start and end points of your line. | |||
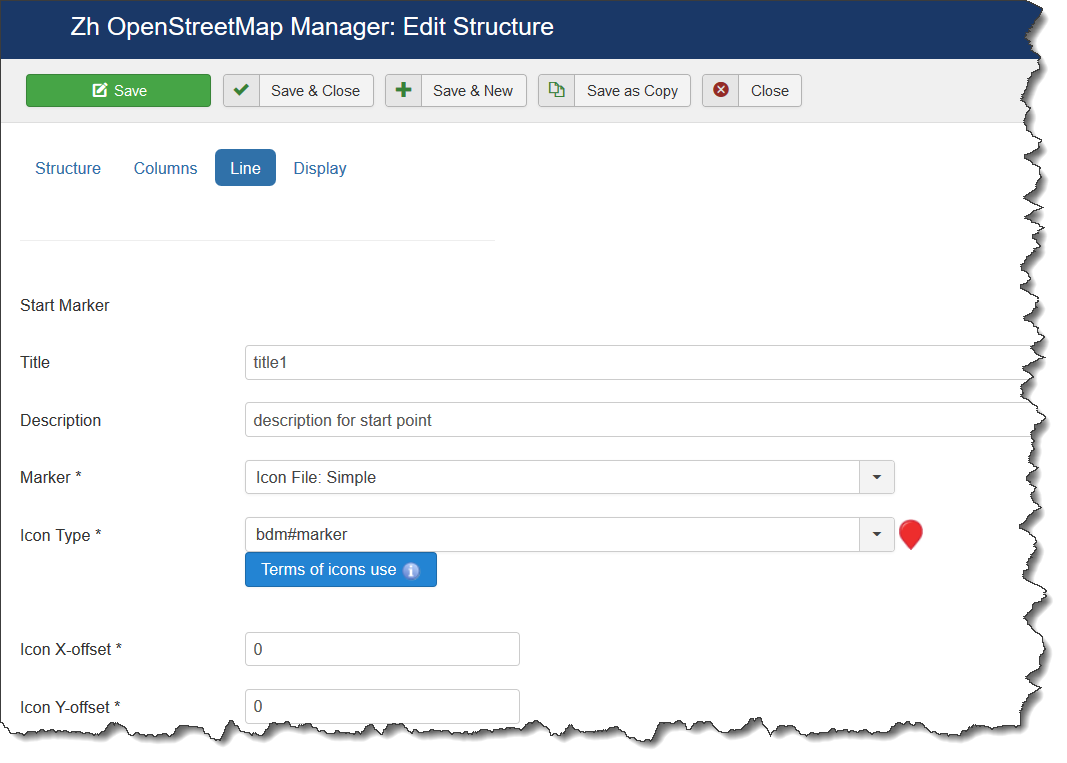
It can be done in Structure part. There is ''Line'' tab with two blocks for markers. | |||
If field ''Marker'' set to '''No''' – marker is not displayed. | |||
If you not enter ''Title'' or ''Description'' – the values will be taken from path properties. | |||
You can manage what information will be in popup and what action by click on marker – it is paths properties. Also path properties – ''URL Site'' and ''Site Name'' you can use too. | |||
''Addition HTML text'' (as it done for markers) will be displayed in any case (if it is exist) | |||
If your path belongs to group, properties for override placemark icon can be applied. | |||
Lets add start and end placemarks. | |||
Go to Structure details, open '''Lines''' tab | |||
Add information for marker 1 | |||
[[File:Visualization-Line-Marker1.png]] | |||
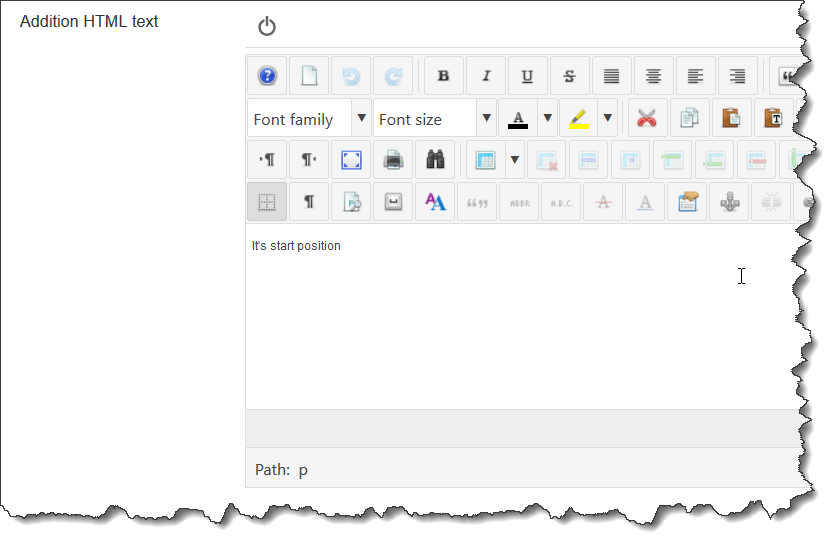
Add some text to Addition HTML text field | |||
[[File:Visualization-Line-Marker1-ai.png]] | |||
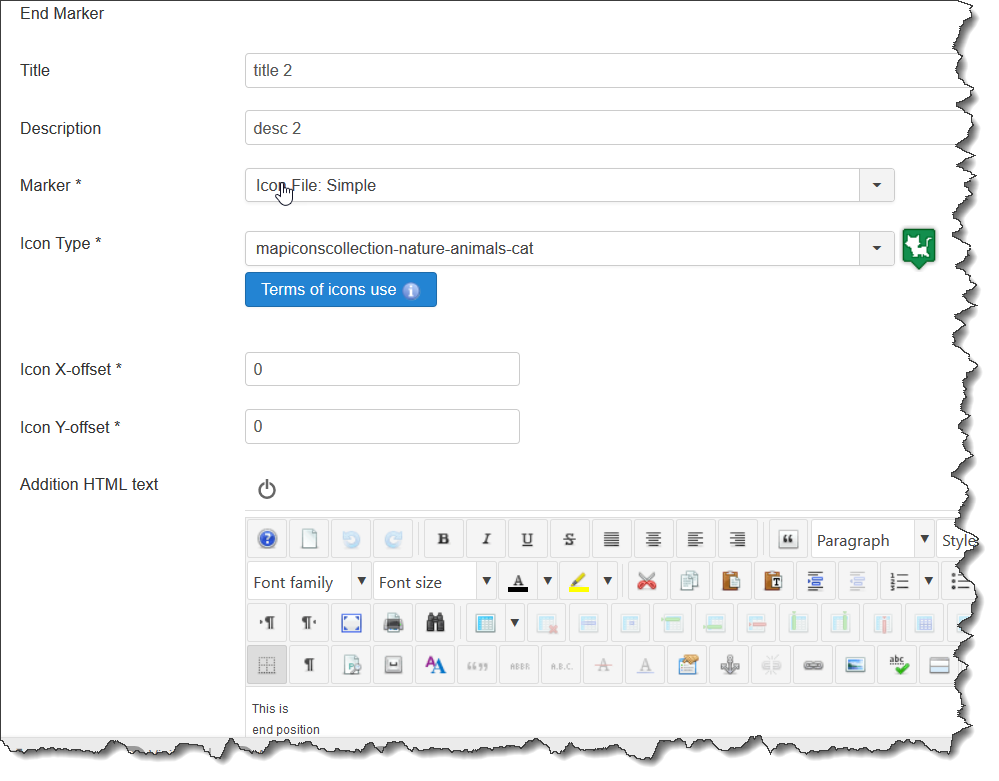
Do the same for marker 2 | |||
[[File:Visualization-Line-Marker2.png]] | |||
If we check map now we can see placemarks (probably without popups), we need add some action. | |||
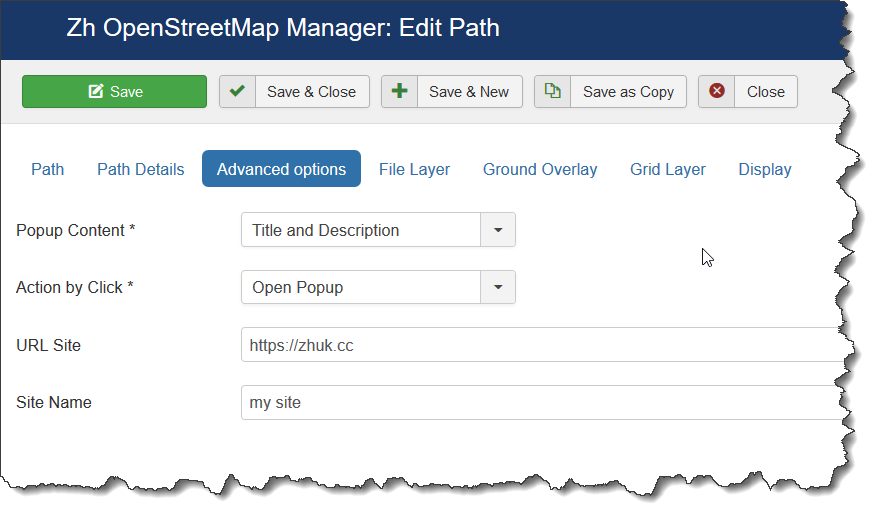
Go to your path details, and define what content of popup we want, what action by click and etc. | |||
[[File:Visualization-Line-Path.png]] | |||
After all out manipulations we have result | |||
[[File:Visualization-Line-Result.png]] | |||
=== Add date of creation === | |||
In some cases we need to add date to out popups. | |||
In our data source we have date to show. | |||
Lets do little changes | |||
In Data Source will add '''createddate''', it is column where our date is | |||
[[File:Visualization-Date-DataSQL.png]] | |||
In Structure will add our column name to definition | |||
[[File:Visualization-Date-Structure.png]] | |||
After that we need to enable showing placemarks date of creation in map properties. | |||
Go to your map details, ''placemarks'' tab | |||
[[File:Visualization-Date-Map.png]] | |||
Last field ''Show placemark creation'' set to '''Date of creation'''. | |||
It is common way to show this date, not only for this two placemarks. | |||
Check what we get | |||
[[File:Visualization-Date-Result1.png]] | |||
Date will be displayed only it is defined. | |||
Lets change date format. It can be done by map override. | |||
Go to map overrides and create new one. | |||
Define title, after that we need do settings for placemark, therefore go to ''Placemark'' tab | |||
[[File:Visualization-Date-Override.png]] | |||
Enter format (it is datetime format for PHP, just search the net for details), save it. | |||
After that go to your map details again, open ''Advanced settings'' tab. Scroll down to find ''Map override'' field. | |||
Select your map override. | |||
And now we get | |||
[[File:Visualization-Date-Result2.png]] | |||
== Variables == | |||
You can pass some parameters to your SQL clause. | |||
Today it is done for used ID, if you want to restrict by user, you can use ''':userid''' variable | |||
For example, here SQL text for getting placemarks | |||
<pre> | |||
SELECT latitude as lat, longitude as lng, createddate, title, description, descriptionhtml, icontype | |||
FROM demo_zhosmmaps_markers as t | |||
WHERE t.mapid = 2 | |||
and t.createdbyuser=:userid | |||
</pre> | |||
In this case variable will be replaced with current user ID value | |||
== Conclusion == | == Conclusion == | ||
Latest revision as of 11:28, 23 June 2020
Preface
Use visualization to show data from other data sources (database tables).
To do it you should do next steps:
- create Structure
- create Data Source, assign your Structure
- create Path or Placemark, assign your Data Source
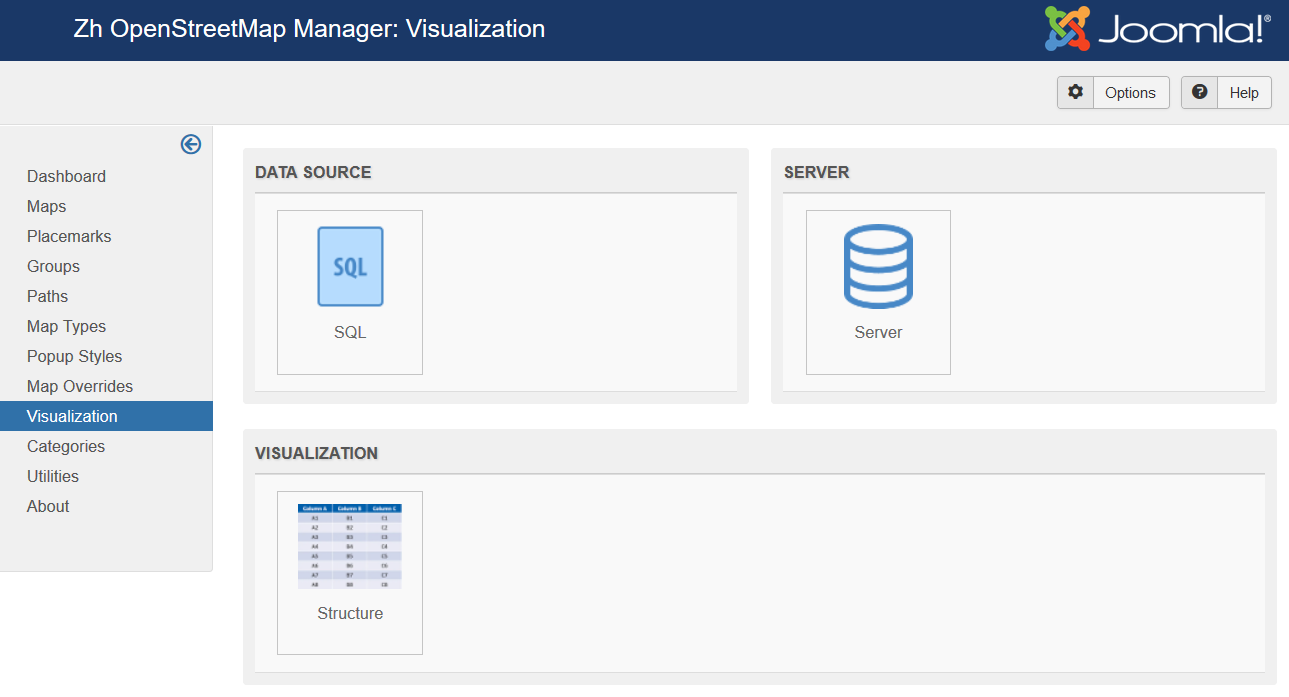
Here you can see main page for visualization.
Structure
In Structure you enter information about your data, ie column names to use from data source, and other attributes.
Data Source
In Data Source you define SQL statement to get data from database.
For flexible use there is only one field for SELECT statement, you can just create it in phpMyAdmin, copy/paste and use it.
You can use for table names as full names, as names in joomla notation (ie starting from #__)
And don't forget about ORDER BY clause in SELECT statement to get correct coordinates order for your lines or polygons
Examples
Lets create a few examples to show how you can use visualization on your site.
I don't create new tables, I will use tables from my extension.
In Example 1,Example 2 and Example 3 I set Result Object to Create one object for all rows. It means all my data will be displayed as one object. And result object is Line as I set in Path properties.
Separate columns for latitude and longitude
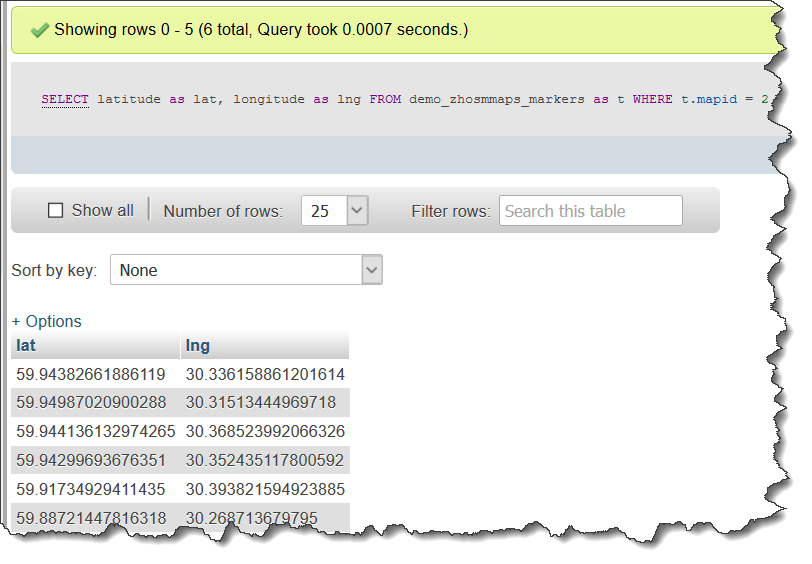
Here my data for example
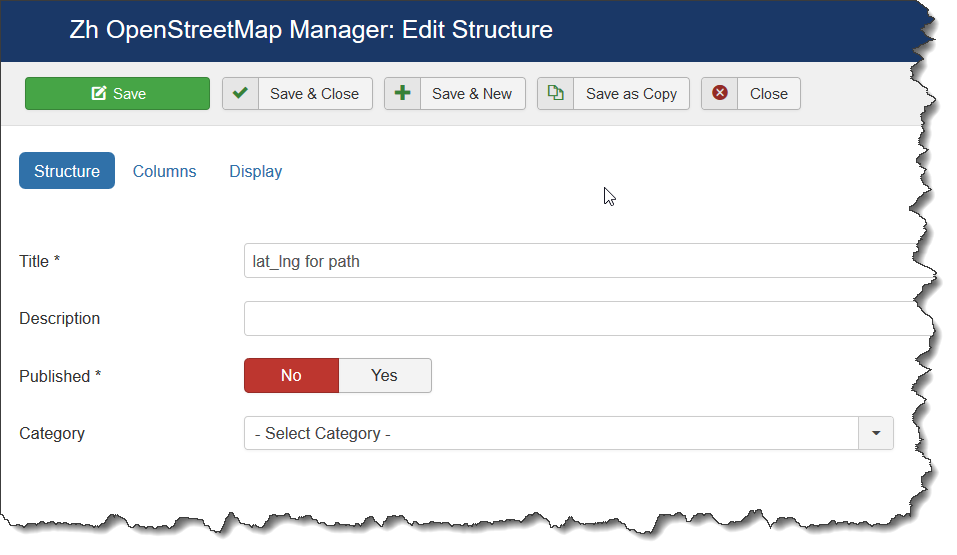
Lets create Structure
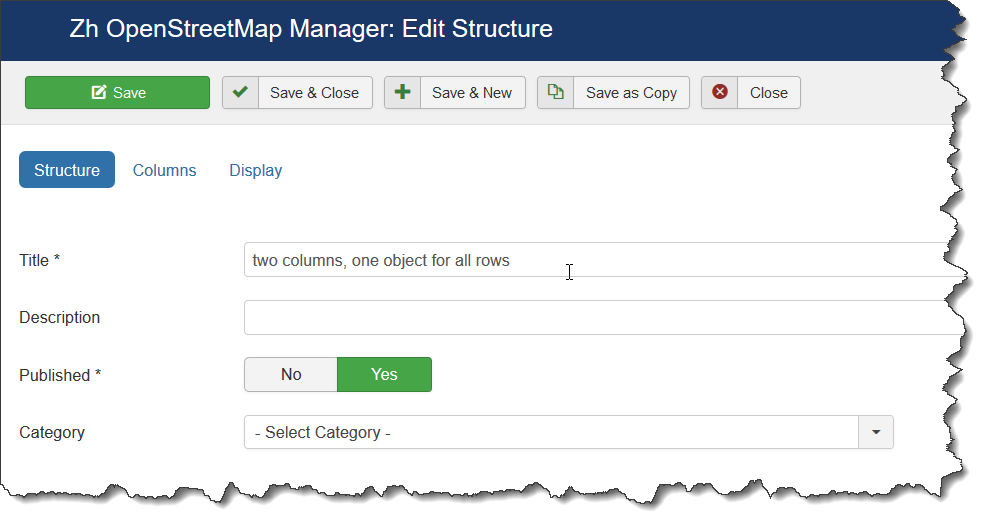
Add main information
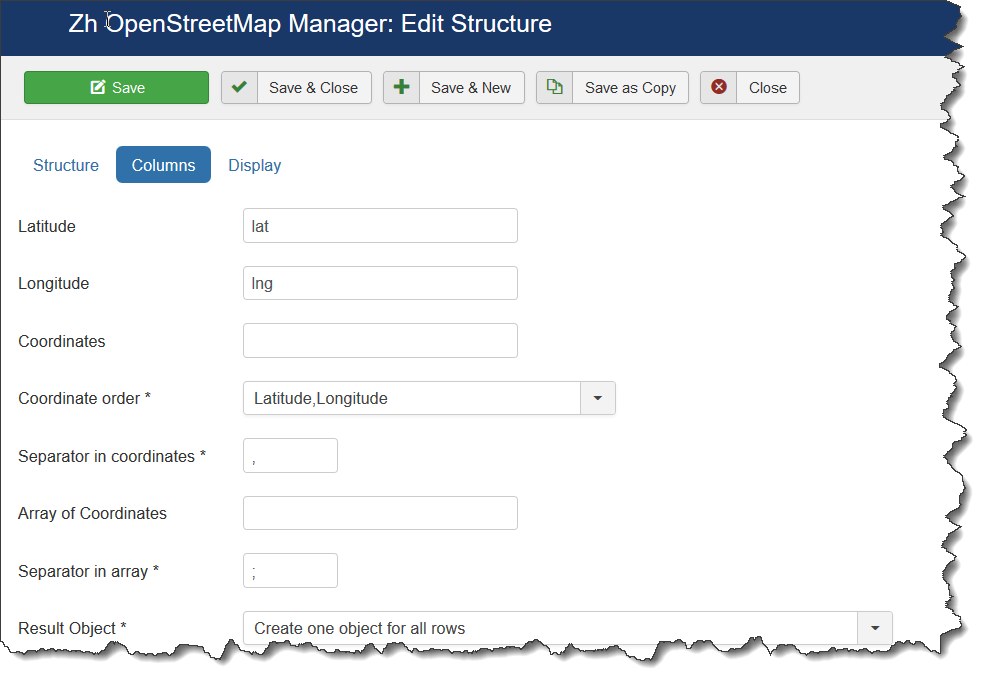
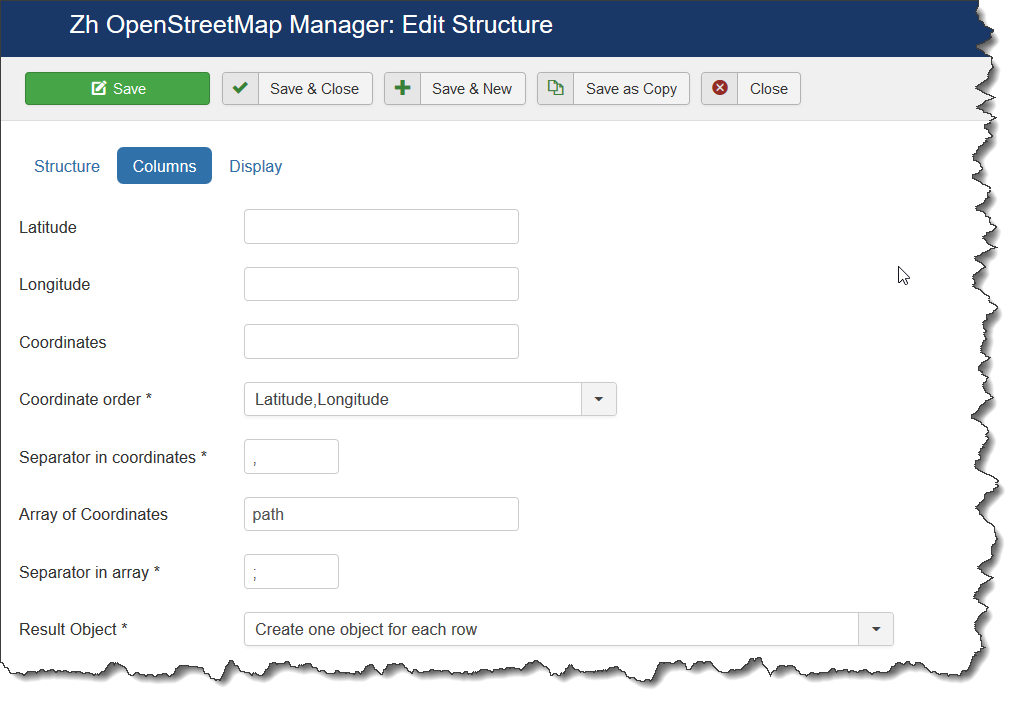
Add columns description
In this example I created structure, which describe that my data will contain two columns - lat and lng.
For this our test example we have to define only two fields.
In other words my SQL will have columns lat and lng
When come back to Structure list we can see our Structure.
For easy way you can press Close button in toolbar to return to main visualization page
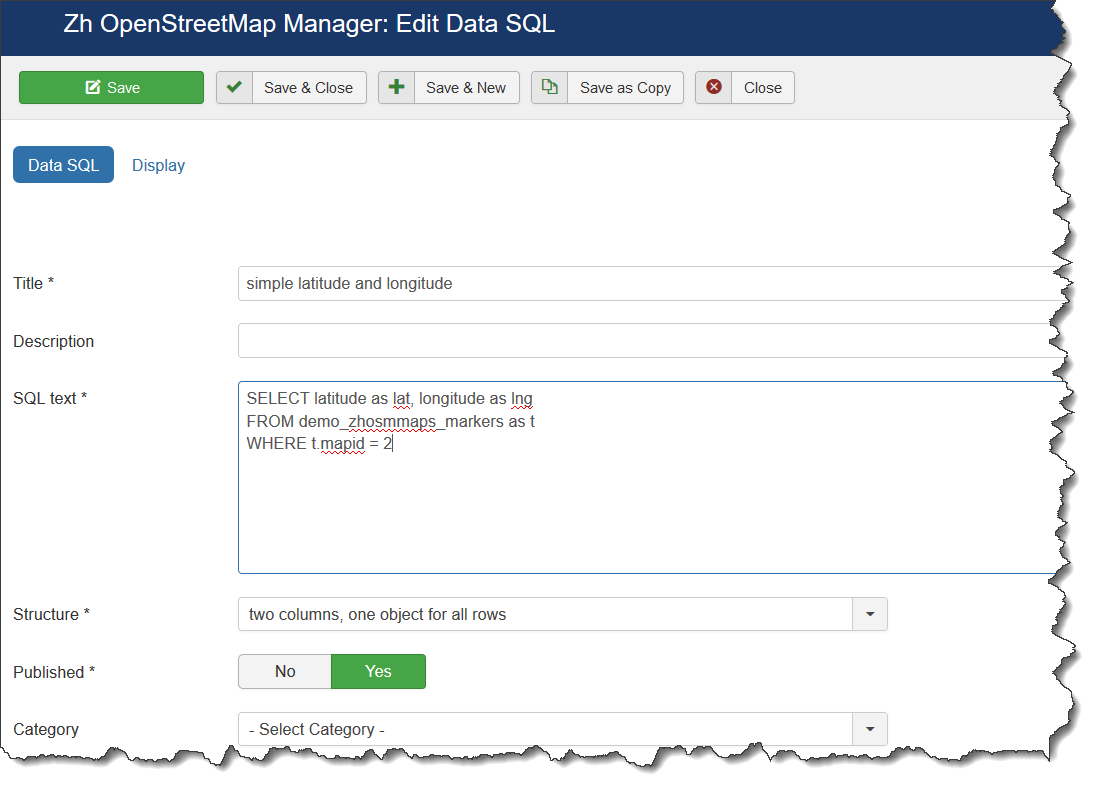
Now we need to create Data Source.
As you can see I use table for placemarks, because it contains latitude and longitude in different fields.
I added aliases for my columns, because I describe in Structure names which differ from table column names.
And as you can see in this source I use our Structure.
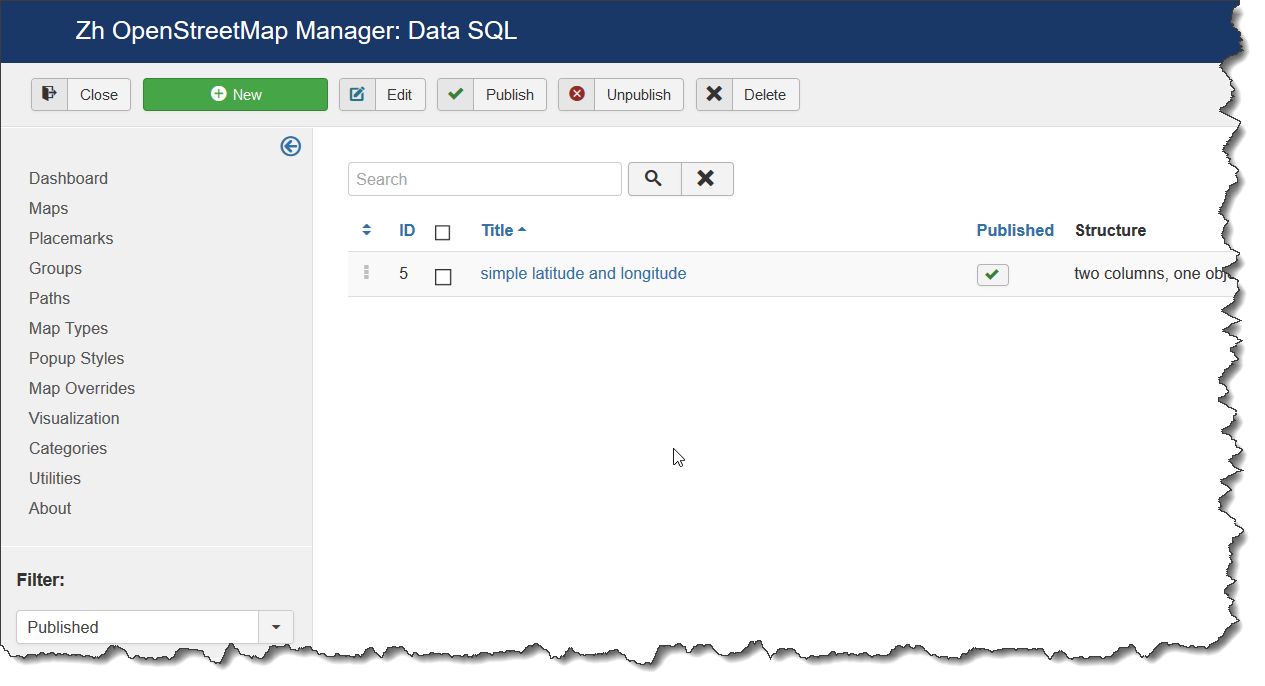
When come back to Data Source list we can see our Data Source
Now lets show this data.
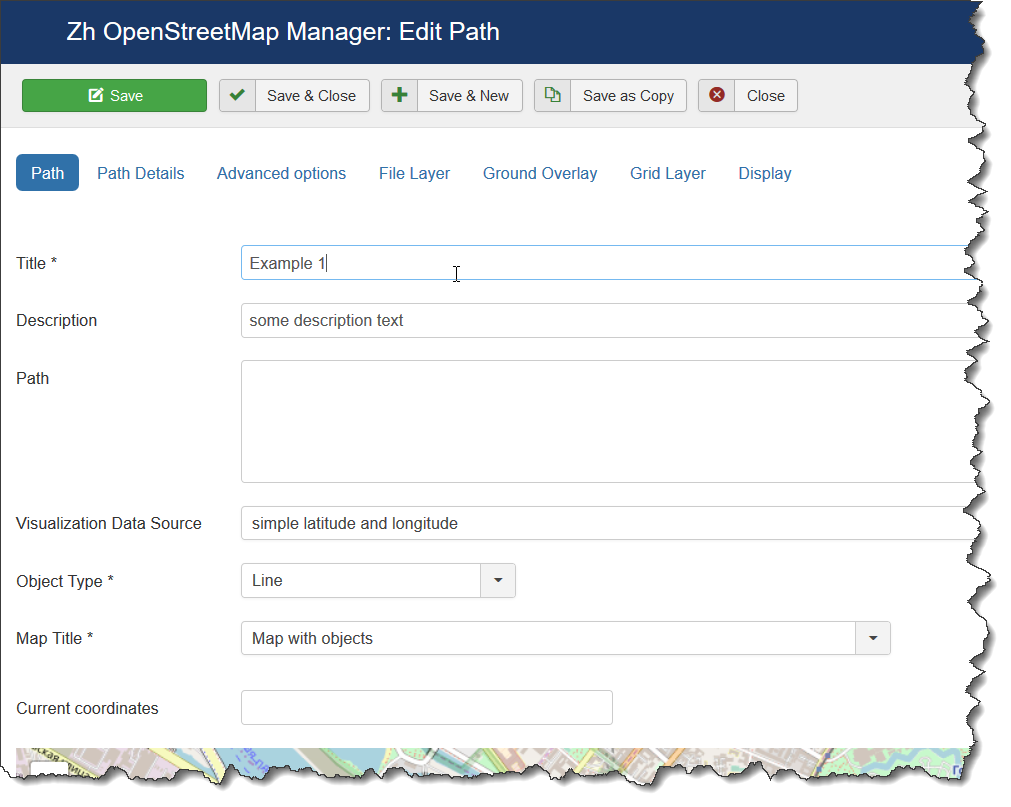
Go to Paths and create new one
Here you set Object Type and Visualization Data Source.
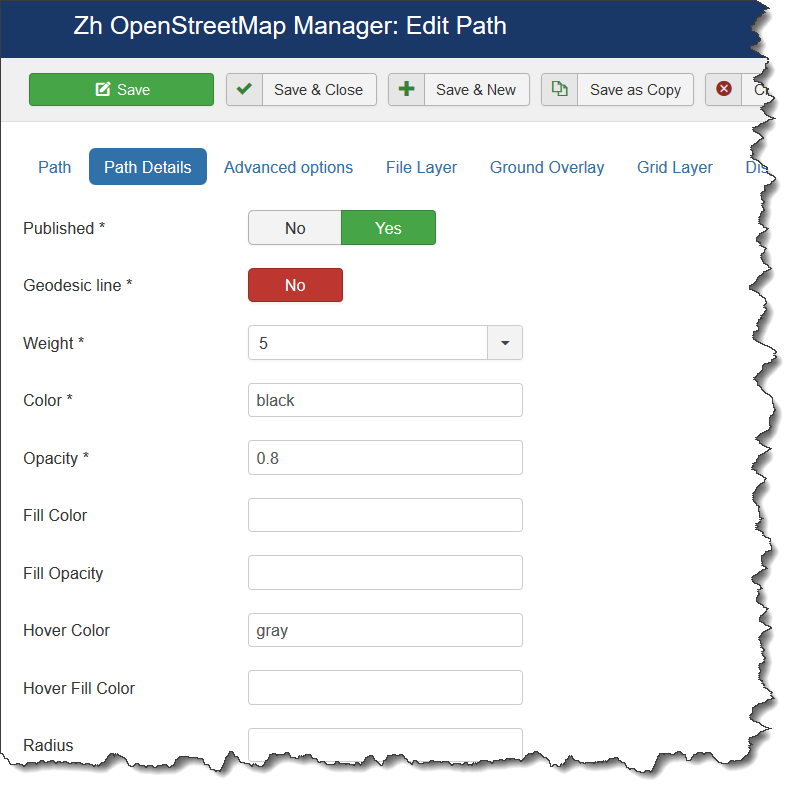
And on details page we need define some attributes to our Line
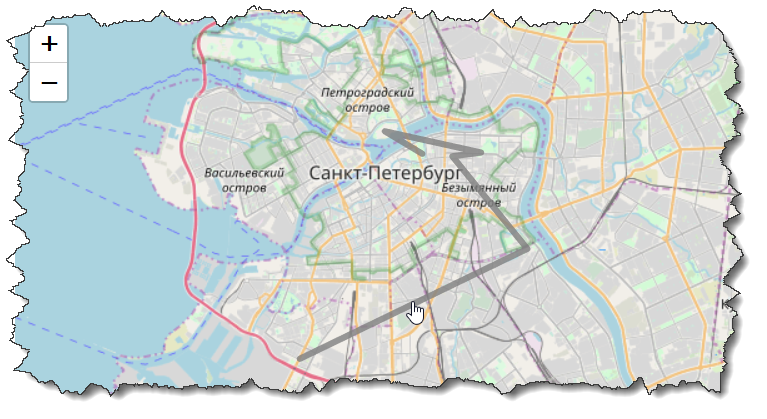
As you can see I set Hover Color.
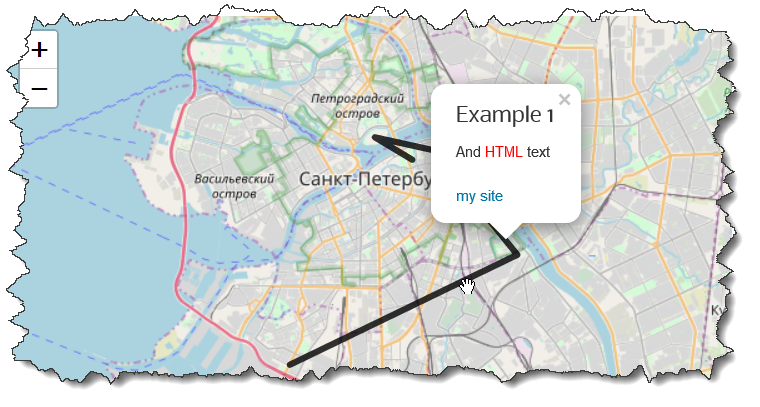
Moreover I enter Addition HTML text, set Action by click to open popup and other Path properties.
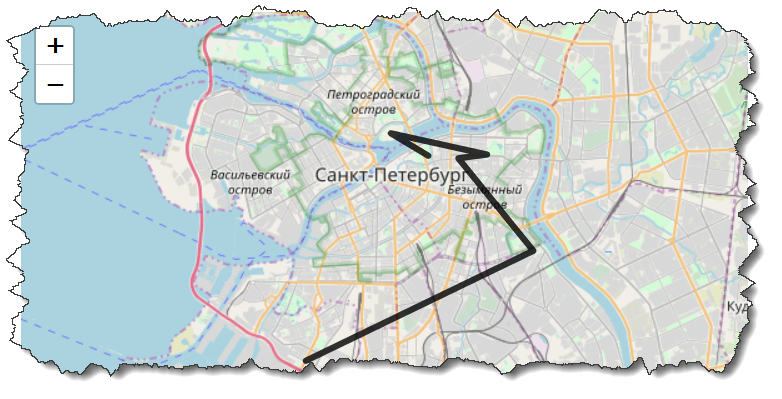
Publish Path and lets check
Main view
Hover
Click
One column for coordinates (latitude and longitude)
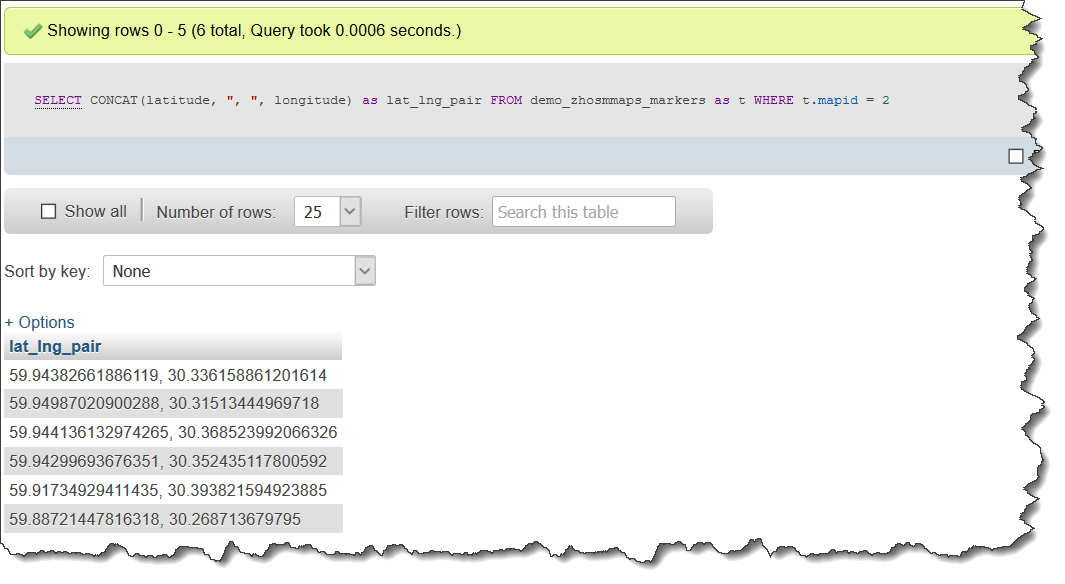
I will rewrite my SQL to get one column, I just concatenate columns
Here my data for example
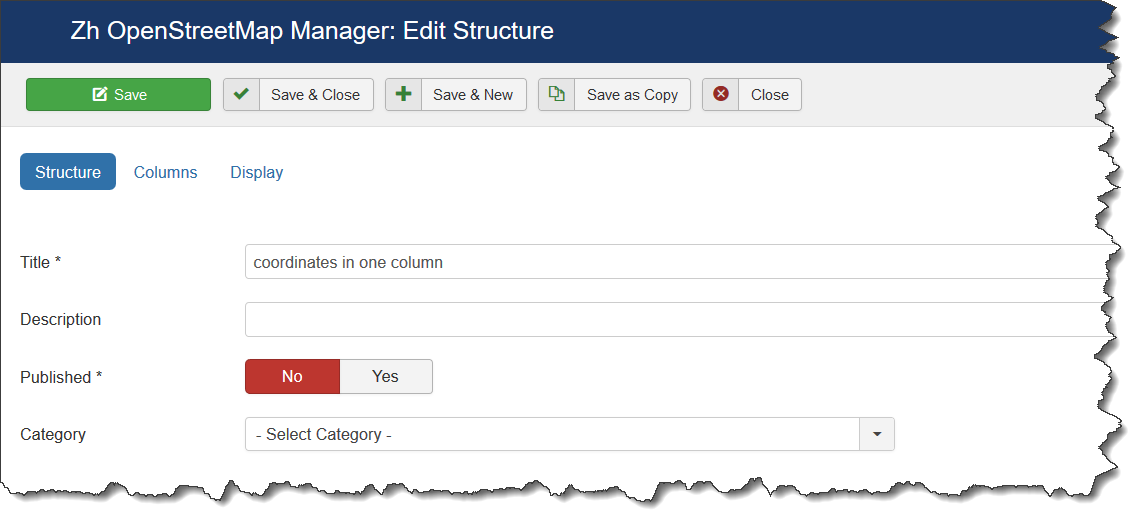
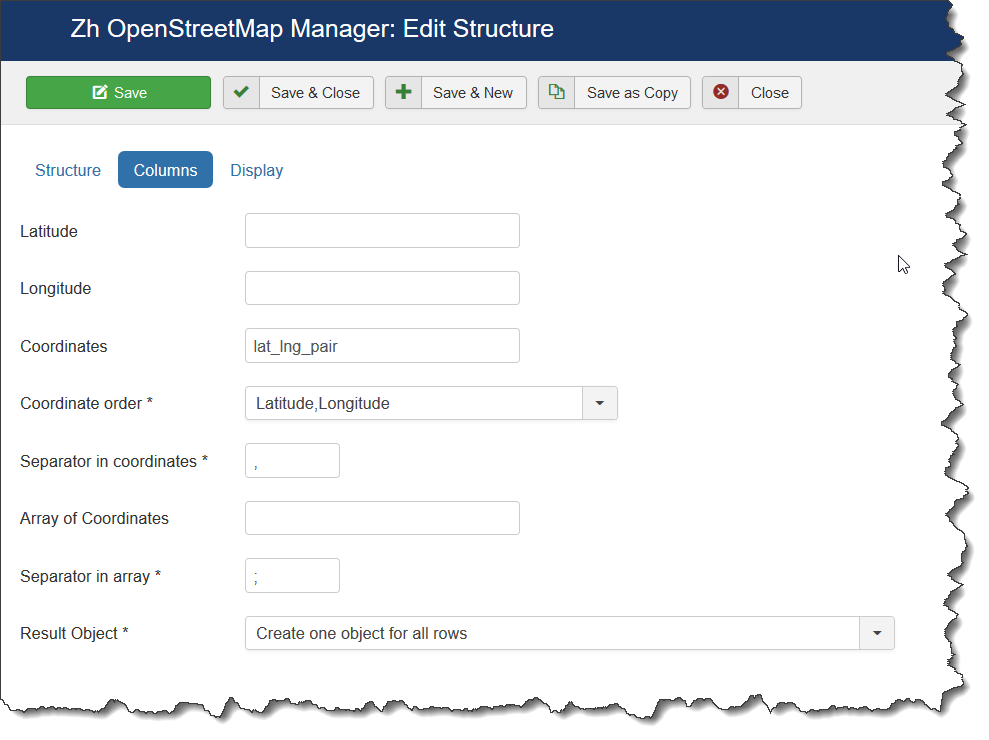
Create Structure
In this case I defined column Coordinates. It means my column contain both coordinates.
Moreover you have to define Separator in coordinates because it is coordinates delimiter.
In addition to this you have to define Coordinates order, ie how it is stored in your column.
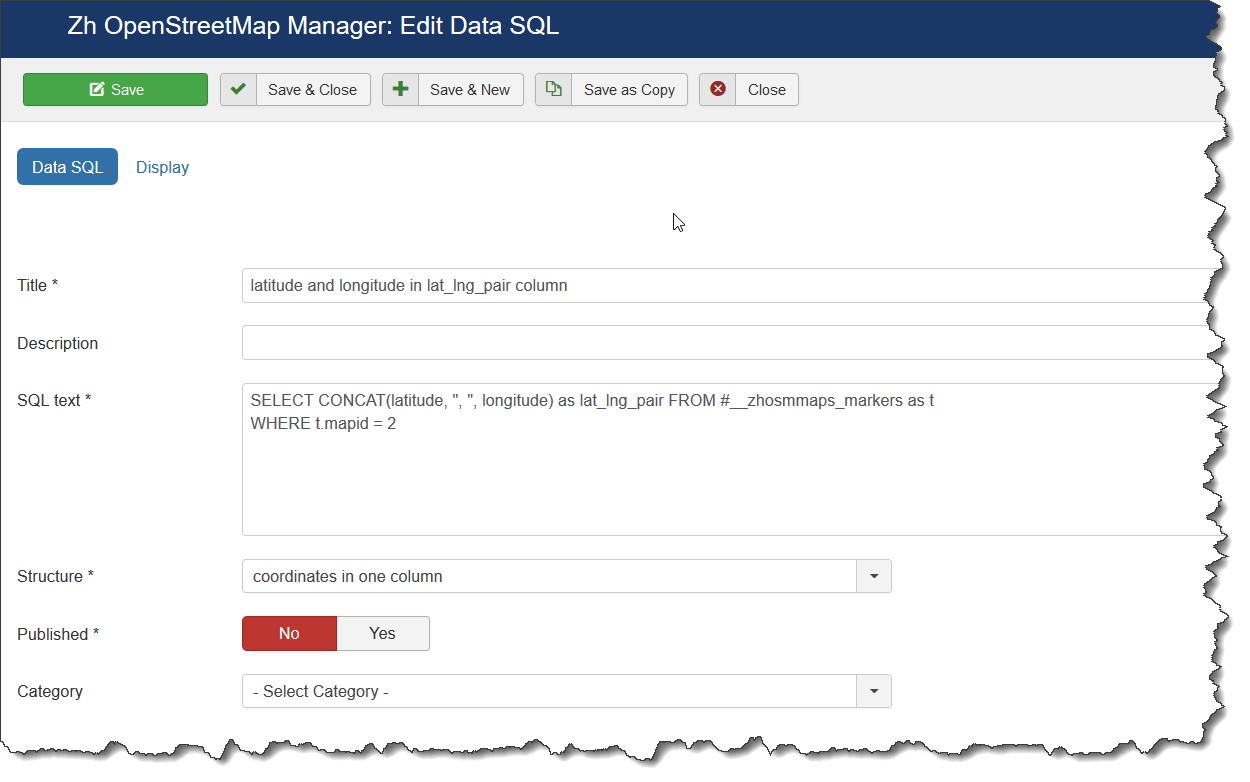
And my Data Source
Here I use joomla notation for table.
The result screens will be the same (because the same data).
One column for coordinates array
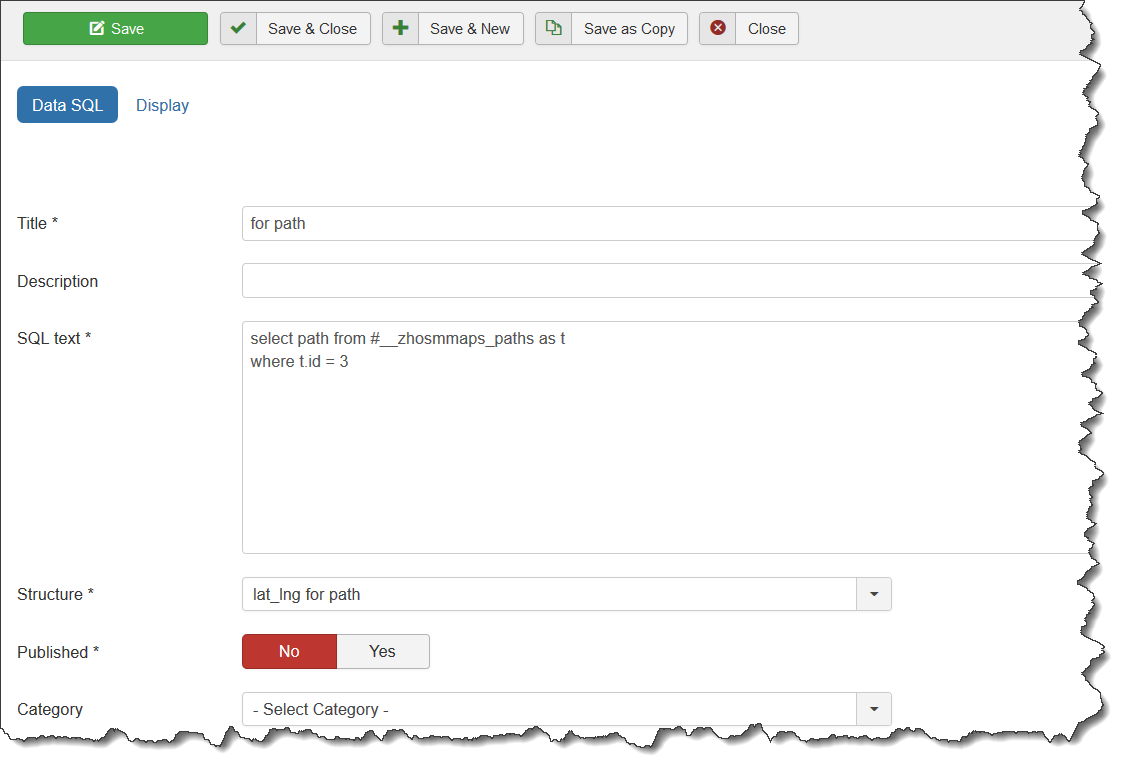
I will use my table for path data as data source
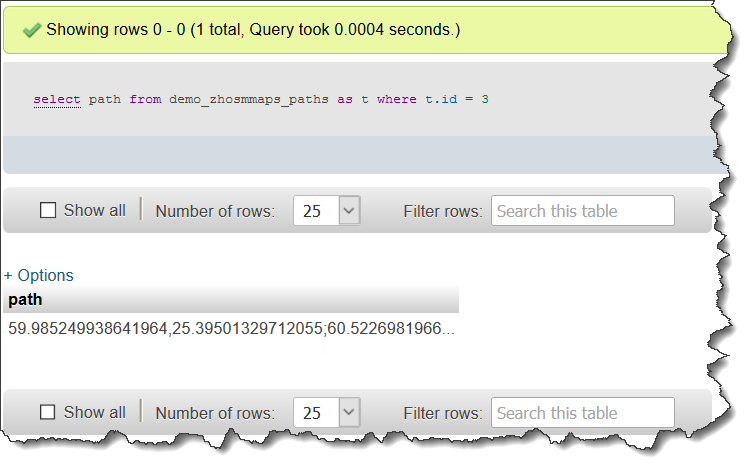
Here my data for example
Create Structure
In this case I defined column Array of Coordinates. It means my column contain array of both coordinates.
As in previous example you have to define Separator in coordinates because it is coordinates delimiter and Coordinates order, ie how it is stored in your column. In addition to this you have to define Separator in Array, because it is pair of coordinates delimiter.
It is like as it is done in Path details (Path property), in this property I use comma as delimiter between latitude and longitude, and I use semicolon to separate pairs in array.
And my Data Source
Here I use joomla notation for table too.
The result screens will be the same as I will display path by its definition.
Server
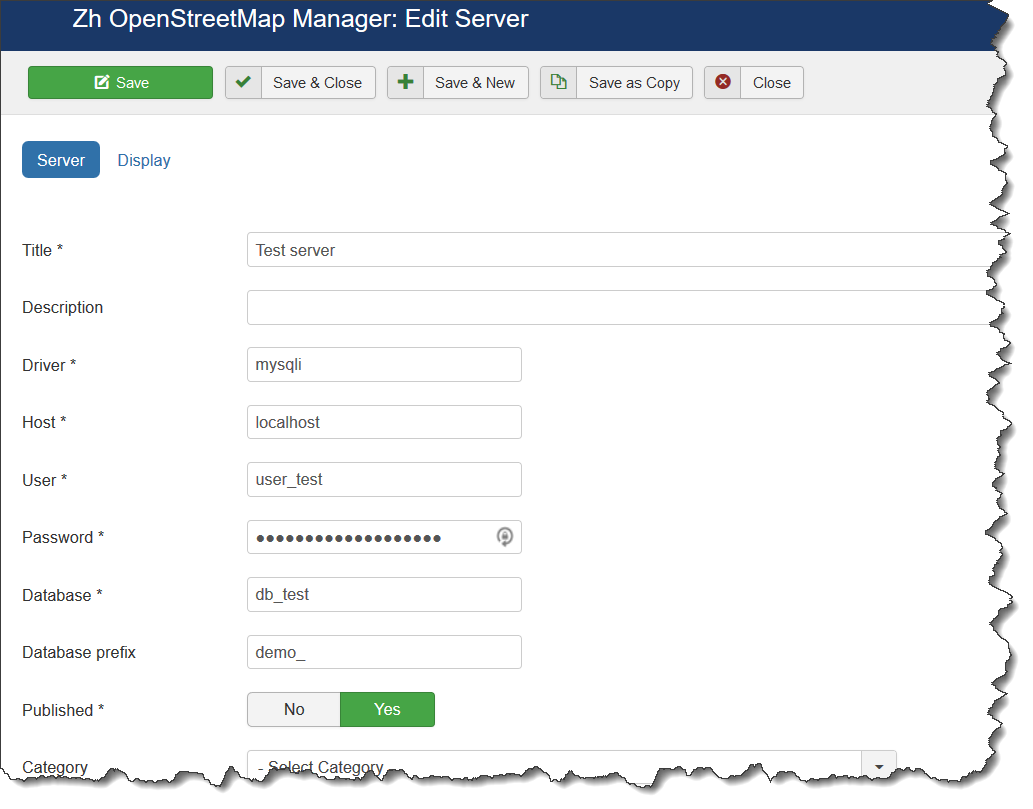
In some cases you need to connect to external database servers
In this case you should create server configuration
As for Driver field, for MySQL you can use mysql or mysqli values, for ms sql server use mssql
And assign it to Data Source
Add Start and End points for Line
If you set path type to Line (to show your data as line) you can show start and end points of your line.
It can be done in Structure part. There is Line tab with two blocks for markers.
If field Marker set to No – marker is not displayed.
If you not enter Title or Description – the values will be taken from path properties.
You can manage what information will be in popup and what action by click on marker – it is paths properties. Also path properties – URL Site and Site Name you can use too.
Addition HTML text (as it done for markers) will be displayed in any case (if it is exist)
If your path belongs to group, properties for override placemark icon can be applied.
Lets add start and end placemarks.
Go to Structure details, open Lines tab
Add information for marker 1
Add some text to Addition HTML text field
Do the same for marker 2
If we check map now we can see placemarks (probably without popups), we need add some action.
Go to your path details, and define what content of popup we want, what action by click and etc.
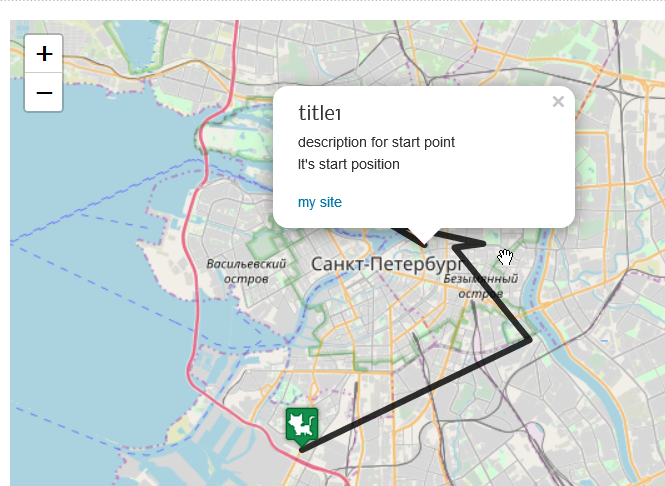
After all out manipulations we have result
Add date of creation
In some cases we need to add date to out popups.
In our data source we have date to show.
Lets do little changes
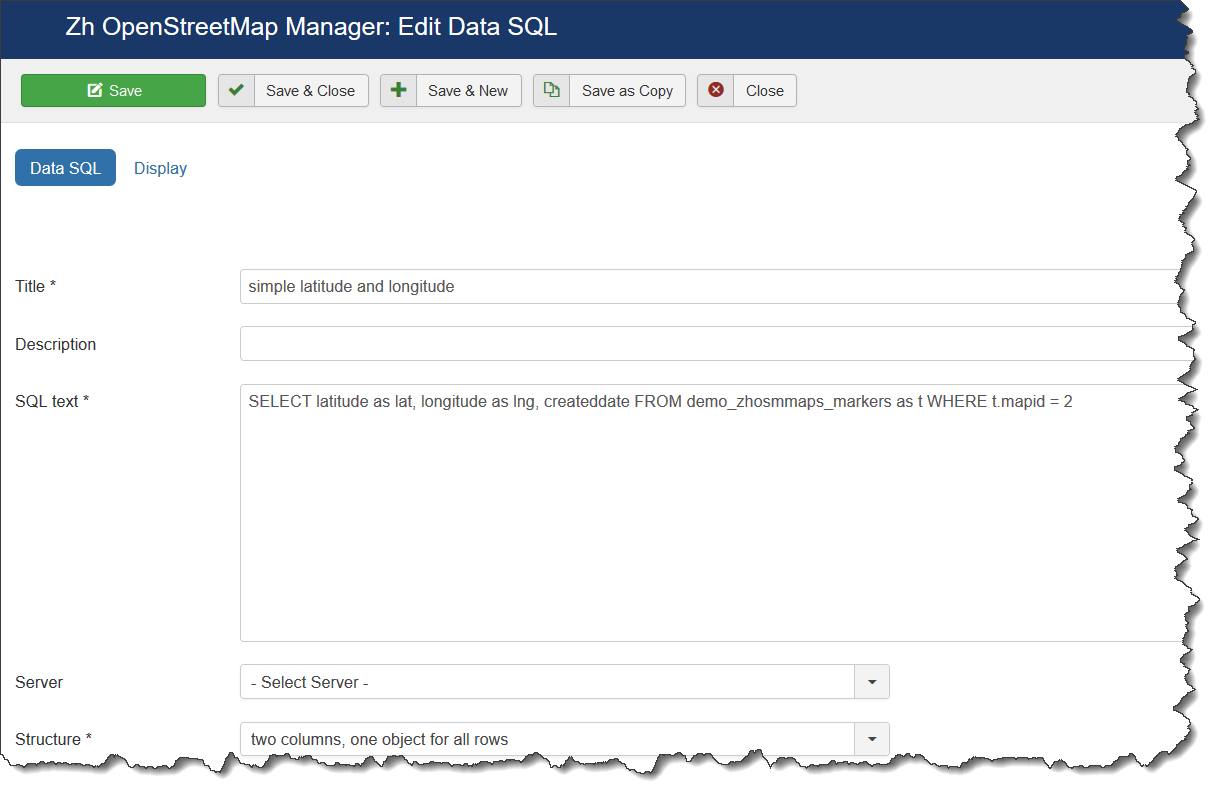
In Data Source will add createddate, it is column where our date is
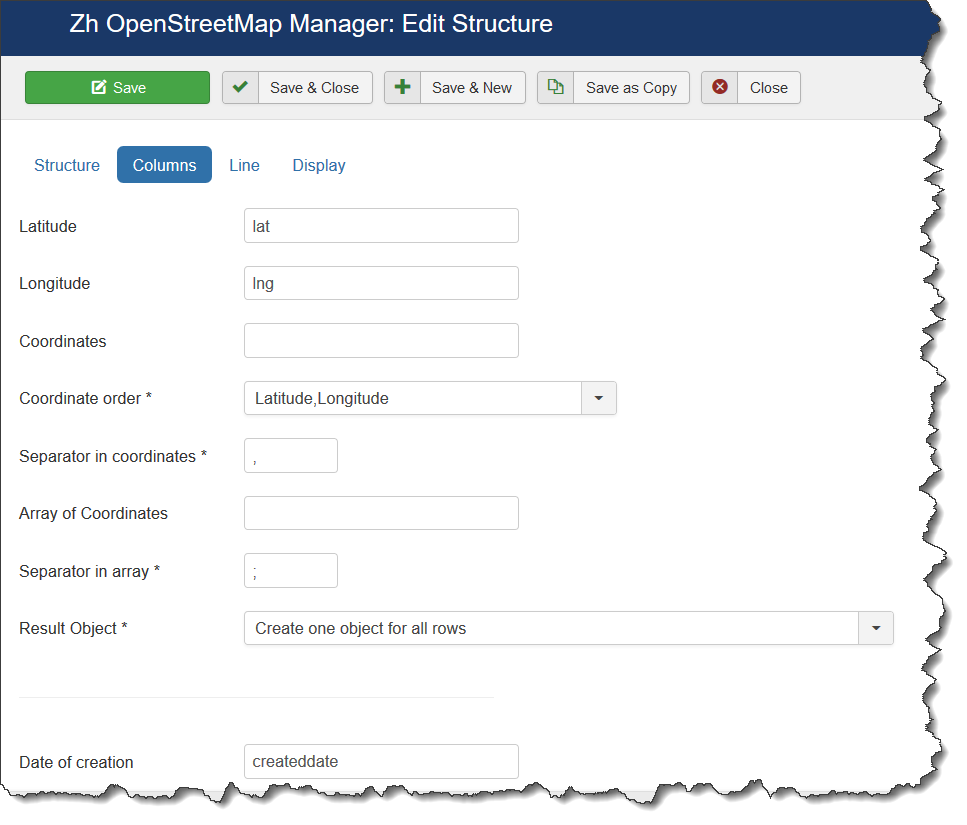
In Structure will add our column name to definition
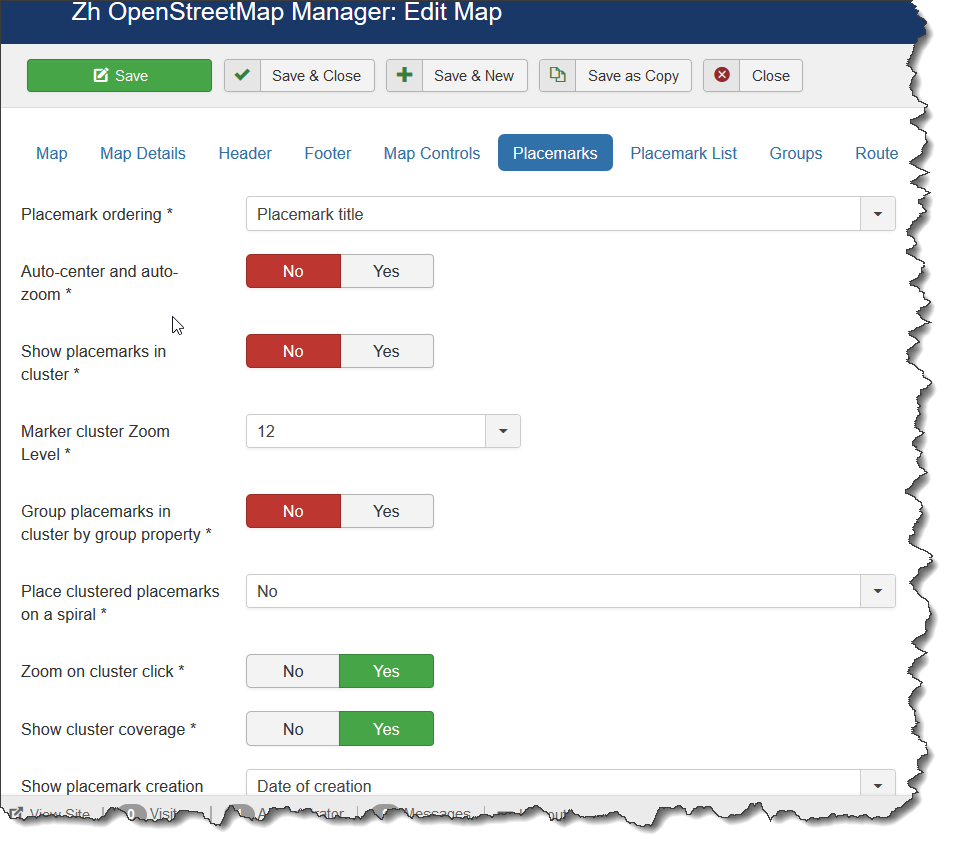
After that we need to enable showing placemarks date of creation in map properties.
Go to your map details, placemarks tab
Last field Show placemark creation set to Date of creation.
It is common way to show this date, not only for this two placemarks.
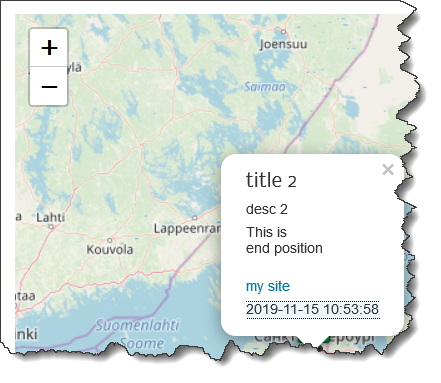
Check what we get
Date will be displayed only it is defined.
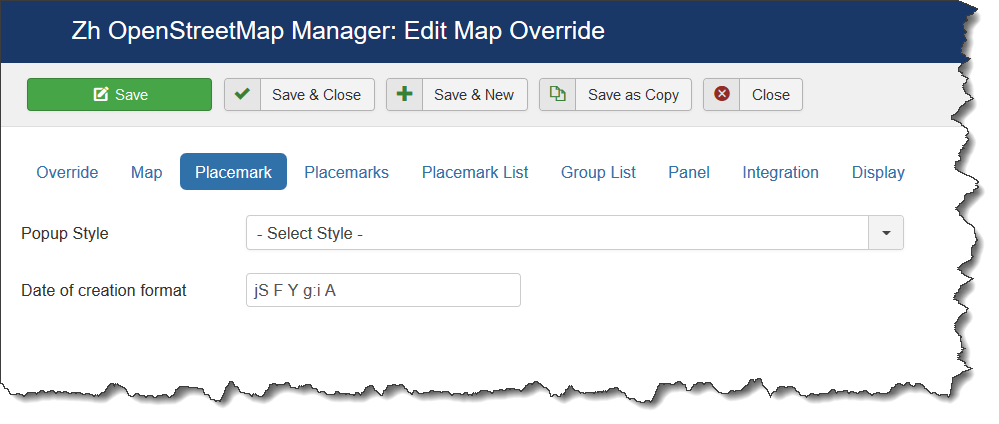
Lets change date format. It can be done by map override.
Go to map overrides and create new one.
Define title, after that we need do settings for placemark, therefore go to Placemark tab
Enter format (it is datetime format for PHP, just search the net for details), save it.
After that go to your map details again, open Advanced settings tab. Scroll down to find Map override field.
Select your map override.
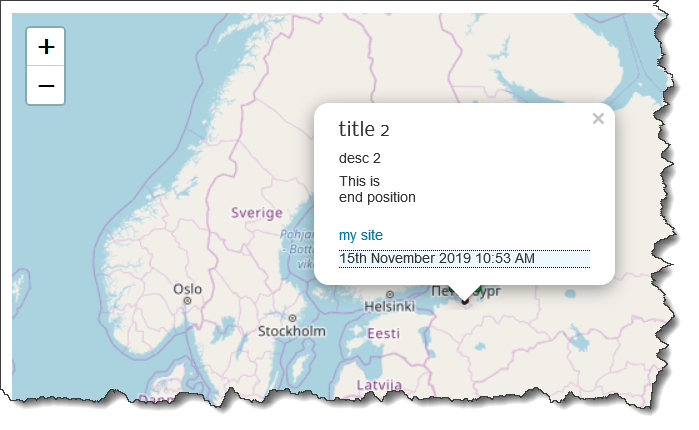
And now we get
Variables
You can pass some parameters to your SQL clause.
Today it is done for used ID, if you want to restrict by user, you can use :userid variable
For example, here SQL text for getting placemarks
SELECT latitude as lat, longitude as lng, createddate, title, description, descriptionhtml, icontype
FROM demo_zhosmmaps_markers as t
WHERE t.mapid = 2
  and t.createdbyuser=:userid
In this case variable will be replaced with current user ID value
Conclusion
As you can see you can easy create visualization, easy control behaviour your map objects.
Structure is separated from Data Source for flexible use, you can create one Structure definition and many Data Sources (with different WHERE clause for main SELECT)
